Abundant Health™ Blog

March 22, 2016
by Abundant Health™
2 Comments

All-Natural Baby Shampoo and Body Wash

Are you looking for a natural shampoo and body wash for your kids or yourself? This recipe is great at getting you clean and even incorporates the relaxing benefits of lavender essential oil. It’s perfect for your toddler’s bedtime bath!

AH_BabyShampoo1

All-Natural Baby Shampoo and Body Wash

Servings: Yield=8 oz. | Time: 5 minutes active | Difficulty: Easy

Ingredients:

Instructions:

  1. Mix all ingredients in the bottle.
  2. Screw the lid on, and shake to combine.
  3. To use, pump out a little at a time, and rub on hair and body. Make sure to rinse off well.

AH_BabyShampoo2

March 19, 2016
by Abundant Health™
1 Comment

Naturally Dyed Easter Egg Diffusers

We’ve had a lot of fun creating Easter egg decorations that incorporate essential oils, and we want to share some of our ideas with you.

First, we tried making a number of different natural dyes from vegetables, fruit juices, spices, etc. We also experimented with adding essential oils to these dyes, but we found that the smell wasn’t very strong once the eggs were finished. Many of the natural dyes turned out great though! As you dye your eggs, you can even make designs by using a white crayon, electrical tape, flowers, or leaves. To make a flower or leaf design, just get the flower or leaf wet, place it on the egg, wrap the egg and flower or leaf up together in a section of nylon, and tie closed before dying.

The dyes we used were from blueberries, red cabbage, beets, red onion skins, yellow onion skins, spinach, turmeric, paprika, cranberry juice, and grape juice. See the recipe below for how to make these dyes.

AH_EasterEggDyeGraphic_800

Next, we tried doing an essential oil transfer and transferred small images and text to some of the eggs by using orange essential oil. This worked great! You can find instructions for how to do this transfer in a previous post: Popsicle Stick Puzzles.
If doing this transfer on eggs, you can use colored ink (darker colors work best). Make sure to flip the image or text so it is readable once it has been applied. You will also want to keep your image or text between 1/2 inch to 2 inches for easy application. Honestly, it is a little tricky to get the image on the egg since the egg isn’t flat; but it can be done with a little pinching and cutting of the paper where the image and text don’t appear.

Lastly, we found that the best way to scent the eggs and turn them into diffusers was to simply mix a few drops of essential oil with a carrier oil (fractionated coconut oil, almond oil, and olive oil work well) and use the mixture to polish each egg. They smelled wonderful and looked shiny when finished!

AH_EasterEggs_600

Naturally Dyed Easter Egg Diffusers

Time: 1 hour active; 24 hours inactive | Difficulty: Moderate

Ingredients:

  • Eggs (You can either use hard-boiled eggs or empty eggshells; but if you are using hard-boiled eggs for decorations, don’t plan on eating them later.)
  • Flowers, leaves, white crayon, electrical tape, etc. for decorating the eggs (optional)
  • Dyes (see below for natural dye suggestions)
  • 1 Tbsp. carrier oil, such as Fractionated Coconut Oil, Sweet Almond Oil, or olive oil
  • 10 drops essential oil of choice (we used flower oils such as lavender, ylang ylang, geranium, clary sage, etc.)

Instructions:

  1. Blow out your eggs by cutting out a small hole (a little bigger than a straw) in the bottom of each egg with a pin. Put a straw into the hole, and blow air into it so the egg comes out. Save the eggs to cook with later. Wash out each egg with water, and let dry overnight. Note: You can also use hard-boiled eggs and skip this step if you don’t care about eating the eggs later. Hard-boiled eggs are a little easier to decorate because they aren’t as fragile.
  2. Once your egg shells are dry, carefully add any decorations, such as flowers or leaves. You can also add designs by drawing on the egg with a white crayon or carefully placing electrical tape where you don’t want dye to cover. Be very careful when decorating if you are using empty eggshells because they are quite fragile.
  3. Prepare your dyes. If using natural dyes, see instructions below for each color. You will want to prepare your dyes in glass or metal dishes because they may leave stains.
  4. Place your eggs in the natural dyes, and let them sit in the refrigerator overnight. Note: We prepared our dyes in glass bowls and cups and then transferred the dyes to disposable plastic cups to let the eggs sit overnight. By doing this, we were able to use less dye to completely cover each egg.
  5. Once the eggs are dyed, remove them from the dye, and allow the egg shells to dry.
  6. Mix together the carrier oil and essential oil. Use a paper towel to polish the eggs with the oil mixture. Just dip the paper towel in the oil, and rub the oil onto the dry egg shells.
  7. Place your egg decorations wherever you desire, and enjoy the aroma they diffuse. If the scent dies down after a few days, you can add more essential oil by mixing more carrier oil and essential oil together and re-polishing the eggs.

Natural Dye Solutions:

Blueberries (Blue-gray) – 1 cup frozen blueberries mixed with 1 cup water. Bring to room temperature, and then remove blueberries.
Red Cabbage (Bright blue) – Cut 1/4 head of red cabbage into chunks, and add it to 4 cups boiling water. Stir in 2 Tbsp. white vinegar. Let cool to room temperature, and then remove cabbage.
Beets (Purple) – Cut 1 medium beet into chunks, and add to 4 cups boiling water. Stir in 2 Tbsp. vinegar. Let cool to room temperature, and then remove beets.
Grape Juice (Lavender or stone gray) – Use 1 cup grape juice.
Spinach (Light green) – Add a large handful of spinach to 2 cups boiling water, and let simmer for 15 minutes; strain. Add 1 Tbsp. white vinegar.
Red Onion Skins (Tan) – Use skins from 6 red onions, and simmer in 2 cups of water for 15 minutes; strain. Add 1 Tbsp. vinegar.
Yellow Onion Skins (Orange) – Use skins from 6 yellow onions, and simmer in 2 cups of water for 15 minutes; strain. Add 1 Tbsp. vinegar.
Paprika (Light orange) – Stir 2 Tbsp. paprika into 2 cups boiling water. Add 1 Tbsp. vinegar.
Turmeric (Yellow) – Stir 2 Tbsp. turmeric into 2 cups boiling water. Add 1 Tbsp. vinegar.
Cranberry Juice (Off-white or pink) – Use 1 cup cranberry juice.

Note: We added vinegar to all of the dyes, but the vinegar seemed to mess up the cranberry juice, grape juice, and blueberry dyes. Our result was less color and more of a bubbly effect. Try it with or without 1 Tbsp. vinegar for 2 cups of dye, depending on the color and effect you want.

March 17, 2016
by Abundant Health™
0 comments

Butternut Squash Pasta Sauce

This delicious pasta sauce flavored with sage and thyme essential oils is sure to have your family asking for seconds.

Butternut-Squash-Sauce-DSC01325_export-M

Butternut Squash Pasta Sauce

Servings: 6 | Time: 30 minutes active | Difficulty: Easy

Ingredients:

    • 4 strips of bacon
    • 2 Tbsp. bacon grease (reserved)
    • 1 cup diced red onion
    • 1 garlic clove, minced
    • 3 cups butternut squash cubes
    • Salt to taste
    • 1 cup low sodium chicken stock
    • 16 oz. fettuccine pasta
    • 1 cup milk
    • 2 drops sage essential oil
  • 1 drop thyme essential oil

Instructions:

  1. Cook bacon either in the oven or in a skillet. Reserve 2 Tbsp. bacon grease.
  2. Chop up bacon, and set aside.
  3. Pour reserved bacon grease in a skillet. Add onion and garlic. Over medium heat, sauté for approximately 2 minutes.
  4. Add butternut squash, salt, and chicken stock. Stir, and then cover. Cook until the butternut squash is tender, approximately 8 minutes.
  5. While the squash is cooking, bring a large pot of water to a boil, and prepare the pasta according to the package directions.
  6. Once the squash has softened, transfer contents to a blender or a food processor. Add milk, sage essential oil, and thyme essential oil; then purée.
  7. Drain pasta, and add the butternut squash sauce to the pasta.
  8. Sprinkle chopped up bacon bits over the top. Enjoy!

March 15, 2016
by Abundant Health™
0 comments

Easter Salve Jars

These darling Easter salve jars make a fun project to do with your kids or grandkids. You can fill them with Easter treats to put in Easter baskets or to give as gifts. You can also use them as cute Easter decorations around your home.

Bunny-2

Easter Salve Jars

Time: 30 minutes active | Difficulty: Easy

Supplies:

  • Foam paint brush
  • Acrylic glue (Choose a glue that adheres to glass.)
  • 4 oz. Glass Salve Jar
  • Glitter (assorted colors)
  • Scissors
  • Craft foam sheets (assorted colors)
  • Hot glue gun
  • Small craft pom poms
  • Craft eyes

Instructions:

  1. Using a foam paint brush, spread a thin layer of glue on the sides of a glass salve jar.
  2. Sprinkle glitter all over the jar, and then shake gently to remove excess glitter.
  3. Set salve jar aside to dry completely.
  4. While the jar is drying, cut pieces of foam into desired shapes for bunny ears, baby chick feet, bunny whiskers, etc.
  5. Once the jar is completely dry, use a hot glue gun to attach foam pieces, pom poms, and eyes to the salve jar.
  6. Fill jar with desired candy or snacks, and twist on the lid.

Extra Idea:

  • Make fun designs on your salve jar by painting circles, stripes, swirls, or other patterns on your salve jar with glue and then sprinkling glitter over the glue.

Many thanks to Crazy Little Projects for the fun idea: http://crazylittleprojects.com/2015/03/easy-easter-candy-jars.html.

March 12, 2016
by Abundant Health™
0 comments

Natural Deodorant

Try this simple recipe for a natural alternative to commercial deodorant that incorporates the benefits of pure essential oils. Feel free to try other essential oil combinations to achieve a scent that you love.

AH-Deodorant

Natural Deodorant

Servings: Yield=1 stick | Time: 30 minutes active; 2 hours inactive | Difficulty: Easy

Ingredients:

Instructions:

  1. Melt the coconut oil and beeswax pellets together in a double boiler.
  2. Stir in the cornstarch, baking soda, and vitamin E oil.
  3. Remove mixture from heat, and stir in essential oils.
  4. Quickly pour the mixture into the empty deodorant container.
  5. Allow the deodorant to completely cool and solidify before using.

March 9, 2016
by Abundant Health™
0 comments

Chicken Alfredo Lasagna Roll-ups

Not only are these lasagna roll-ups pretty to look at, but they are declicious too! Impress your family and friends with this classy meal.

Lasagna-Roll-up-2

Chicken Alfredo Lasagna Roll-ups

Servings: Yield=7 lasagna roll-ups | Time: 30 minutes active; 35 minutes inactive | Difficulty: Moderate

Ingredients:

  • 7 lasagna noodles
  • 1 cup ricotta cheese
  • 1/4 cup frozen spinach, defrosted and water squeezed out
  • 1 1/2 cups grated cheddar cheese, divided
  • 1 cup cooked chicken, cut into small pieces
  • 8 oz. prepared alfredo sauce, divided
  • 1/8 tsp. red pepper flakes
  • 1 drop rosemary essential oil
  • 1 toothpick oregano essential oil

Instructions:

  1. Cook lasagna noodles according to package directions.
  2. Preheat oven to 375 degrees Fahrenheit.
  3. In a medium-size bowl, combine the ricotta cheese, spinach, 1 cup cheddar cheese, chopped chicken, 1 Tbsp. of alfredo sauce, and red pepper flakes.
  4. Stir in the rosemary and oregano essential oils (dip a toothpick in the oregano oil, and then swish the toothpick around in the ricotta mixture).
  5. Take a lasagna noodle, and spread some of the ricotta mixture across it. Then roll the noodle up tightly, and place it, seam down, in a greased baking dish. Repeat until you have used all of the noodles and ricotta filling.
  6. Pour alfredo sauce on top of the lasagna roll-ups, and sprinkle the remaining cheese on top.
  7. Bake in preheated oven for 25–35 minutes, or until the roll-ups are hot and bubbly.
  8. Serve lasagna roll-ups with a garden salad. Enjoy!

March 5, 2016
by Abundant Health™
0 comments

Toilet Freshener Tablets

Sometimes our toilets need a little freshening, so why not give them some essential oil love? These tablets are made out of baking soda, citric acid, water, and essential oils and will fizz when dropped in water. As the tablet fizzes in the toilet, it can help loosen grime, making the toilet easier to clean, and provide a lovely scent to help your bathroom smell great!

AH_ToiletFreshenerTablets1

Toilet Freshener Tablets

Servings: Yield=18–20 tablets | Time: 10 minutes active; 10 hours inactive | Difficulty: Easy

Ingredients:

  • 1 1/2 cups baking soda
  • 1/2 cup citric acid
  • 2 tsp. water (more if needed)
  • 80–90 drops desired essential oils (We used 20 drops each of lemon, peppermint, rosemary, and orange.)
  • 15 ml spray bottle (An “empty” oil bottle with a spray top works well.)
  • Silicone mold, ice cube tray, etc.
  • 16 oz. PET Jars or other air-tight container to store the toilet freshener tablets

Instructions:

  1. In a small bowl, mix together the baking soda and citric acid.
  2. Add the water and essential oils to the 15 ml spray bottle, and shake to combine. A funnel may help with this process.
  3. Gently spray the essential oil/water solution into the dry mixture as you stir, until all of the oils have been added. Using the spray bottle helps minimize the fizzing action as the water is added to the citric acid.
  4. Once you have sprayed out all of the essential oil/water solution, test the mixture by squeezing a little in your hand to see if it clumps together. If it doesn’t clump well, add a little more water to the spray bottle, and continue spraying the mixture and stirring just until it can can form a good clump.
  5. Transfer the mixture to your mold or ice cube tray, and pack down firmly. A silicone mold works really well for this and allows the tablets to come out nicely once dry.
  6. Allow the tablets to dry for several hours or overnight before using.
  7. Store your toilet freshener tablets in an air tight container such as these PET jars.
  8. To use, simply place 1 tablet in the toilet, and let it fizz and release its aroma. Depending on the essential oils used, these tablets may help loosen grime and make the toilet easier to scrub, or they can simply be used to help freshen the scent of the bathroom.

AH_ToiletFreshenerTablets2

March 3, 2016
by Abundant Health™
0 comments

Essential Oil–Scented Play Dough

Play dough can be a great tool for sparking creativity in both children and adults. You can make a great sensory experience by adding essential oils to your play dough. This recipe makes a smooth, shiny, colorful, scented play dough that lasts a long time before drying out!

AH_PlayDough1

Essential Oil–Scented Play Dough

Servings: Yield=4 play dough balls | Time: 20 minutes active | Difficulty: Easy

Ingredients:

  • 2 cups all-purpose flour, divided
  • 1/2 cup salt, divided
  • 2 Tbsp. cream of tartar, divided
  • 2 Tbsp. vegetable oil, divided
  • 1 1/2 cups boiling water, divided
  • Food coloring
  • Essential oil
  • Vegetable Glycerin
  • 4 oz. Salve Jars

Instructions:

  1. In four separate bowls, add 1/2 cup flour, 1/8 cup (2 Tbsp.) salt, 1/2 Tbsp. cream of tartar, and 1/2 Tbsp. vegetable oil, and stir together.
  2. In a small saucepan, bring 1 1/2 cups of water to boil. Once boiling, remove from heat, and place 1/3 cup of water in four separate bowls or cups. Stir in a different color of food coloring in each bowl or cup of hot water. Keep in mind that the coloring will be lighter once added to the flour mixture, so you may need more than you think. About 10 drops of food coloring for each bowl should work well.
  3. Add a bowl of water to each bowl of flour mixture, but add just a little bit of water at a time as you stir the dough. Continue adding water until the dough feels just right. If you added too much water, you can add a little flour and knead it into the dough until you get the right consistency.
  4. Once you have your colored dough balls, make a little well in each one, add a few drops of essential oil and a drop or two of vegetable glycerin to each ball, fold the dough so it closes over the well opening, and then continue to knead the dough for about 60 seconds each ball. If you find the scent of the dough is not strong enough, add  a few more drops of the essential oil.
  5. Store each piece of dough in a 4 oz. salve container, ziplock bag, or other air-tight container.

Extra Ideas:

  • Adding the food coloring to the water is a much cleaner way to get the color distributed evenly throughout the dough than adding the coloring after the dough is formed. But, if you would rather, you can always just make one bowl of flour mixture by following the measurements above, add the boiling water in increments until you have a good dough, divide the dough as desired, and then add your food coloring just like you would add the essential oil.
  • Be sure to choose essential oils that are safe for children. It’s fun to choose oil scents that go along with each color, and this also makes for a fun sensory experience. For example, mix a drop of lemon essential oil in with the yellow play dough, a drop of peppermint essential oil in with the green or blue play dough, a drop of orange essential oil in with the orange play dough, a drop of lavender essential oil in with the purple play dough, etc.

AH_PlayDough2

February 27, 2016
by Abundant Health™
5 Comments

Laundry Scent Enhancer

Are you looking for a way to enhance the scent of your laundry without all the toxic chemicals? Try this extremely simple recipe for boosting the scent of your laundry. It is especially great to use on freshening up your linens and towels!

IMG_1144_export-H

Laundry Scent Enhancer

Servings: Yield=2 cups | Time: 5 minutes active | Difficulty: Easy

Ingredients & Supplies:

Instructions:

  1. In a mixing bowl, stir together the Epsom salts and essential oil until well combined.
  2. Transfer the mixture to the plastic jar.
  3. When ready to use, scoop 1/4 cup of laundry enhancer into the basin of your washing machine.

You will love this all-natural way of improving the scent of your laundry!

February 26, 2016
by Abundant Health™
0 comments

Essential Oils and Dilution

We have been asked a lot about recommended dilution amounts when using essential oils. The amount of dilution needed depends largely on many different factors, such as the essential oil being used and whether or not the person is a child, has sensitive skin, is pregnant, is diabetic, or is dealing with epilepsy or high blood pressure. For detailed information on each essential oil, please see the Reference Guide for Essential Oils by Alan and Connie Higley, pp. 573–589. The information provided in this post consists of general tips and recommendations.

EODilution1

The information on this page is for educational purposes only. It is not meant to be used to diagnose, prescribe, or treat any disease, illness, or injury. Seek professional medical attention for any disease, illness, or injury.

First, it may be important to define a few terms.

Neat: This refers to the essential oil being applied without dilution.

Dilution: This refers to combining an essential oil with a carrier oil so that its effects are not so concentrated in one area.

Carrier Oil: A carrier oil is a vegetable oil derived from the fatty portion of a plant, usually from the seeds, kernels, or the nuts. Carrier oils are used to dilute and “carry” an essential oil into the skin during topical application.

Why should I dilute essential oils?

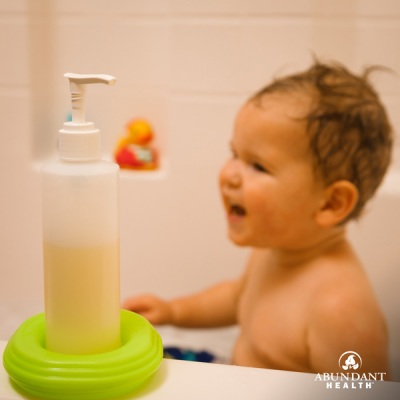
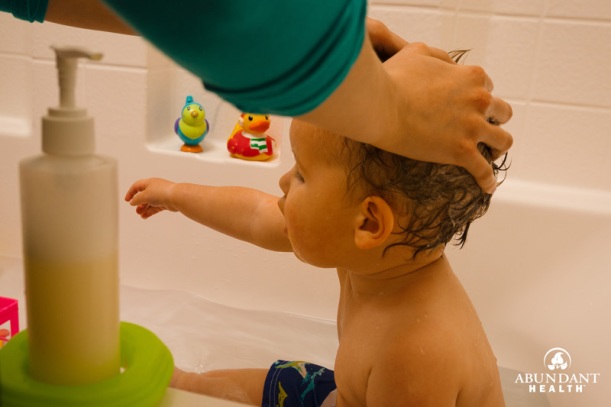
Since essential oils are really potent, and some oils may cause irritation, diluting the essential oil with a carrier oil is recommended. Children, pregnant women, and those with sensitive skin should always dilute essential oils. Diluting an essential oil in carrier oil is also a great way to help spread the essential oils over a larger area.

How do I dilute an essential oil?

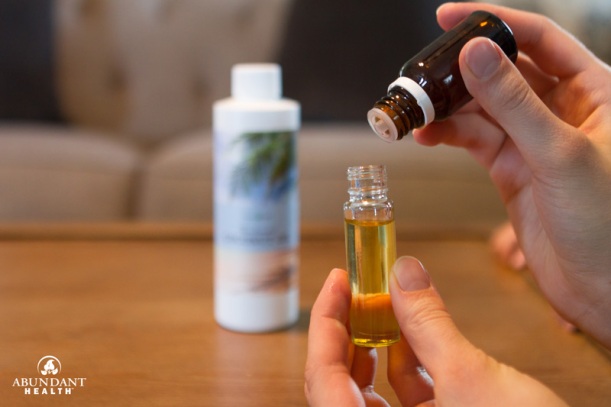
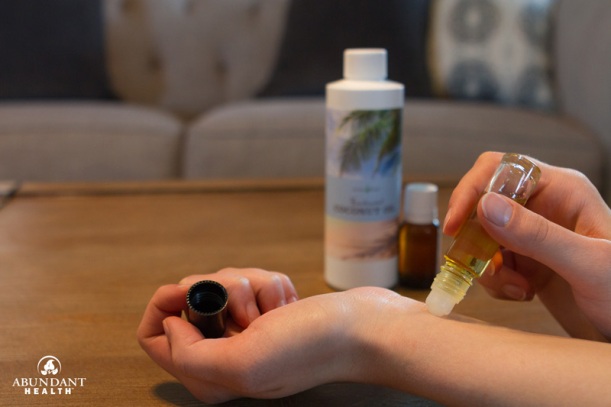
To dilute an essential oil, simply mix the essential oil with the recommended amount of carrier oil. You can do this at the time of application by mixing the oils in the palm of your hand or in a small glass dish; or you can prepare a diluted essential oil mixture ahead of time and store it in a bottle. A roll-on bottle (or roller bottle) is useful for diluting an essential oil for topical application and applying essential oils easily to the skin. A dropper bottle can help you easily dilute essential oils to take internally by capsule.

EODilution2

What are the recommended dilution ratios?

In general, many essential oils can be used neat, but some do require dilution. For most adults, a 1:1 or 1:2 ratio (essential oil drop:carrier oil drop) is a good rule of thumb for most oils. For “hot” oils, such as cassia, cinnamon, clove, oregano, thyme, lemongrass, or lemon myrtle, the recommended dilution ratio is 1:4.
For children, pregnant women, or those with sensitive skin, we recommend diluting 1 drop of essential oil in 1–3 tsp. of carrier oil.

What are good carrier oils to dilute an essential oil with?

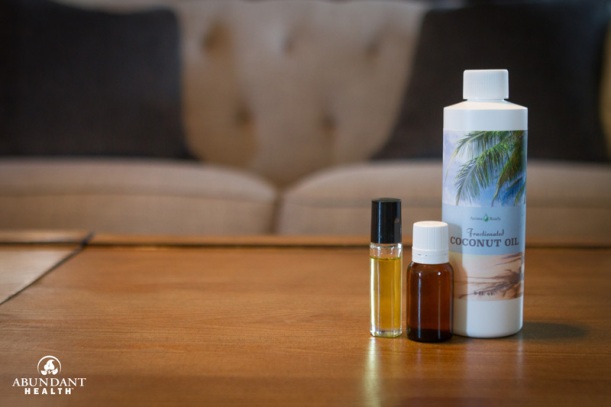
Some great carrier oils for diluting essential oils include Almond Oil, Fractionated Coconut Oil, Jojoba Oil, Coconut Oil, and olive oil.

Fractionated Coconut Oil (FCO) is a common carrier oil because it is clear, odorless, and absorbs easily into the skin.

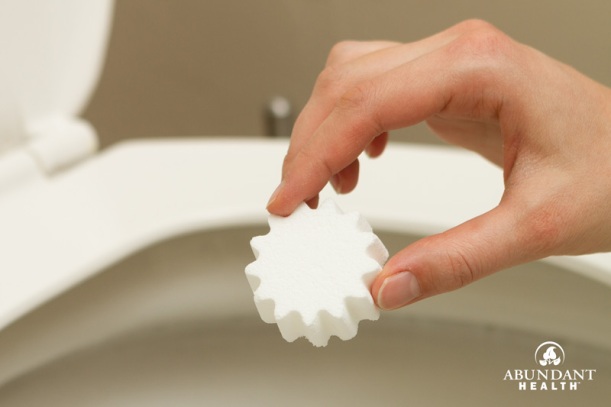
You can also use a dilution stick like this one to rub onto the skin before applying the essential oils.

EODilution3

What do I do if I get a reaction on my skin from an essential oil?

If a rash develops or you feel a burning sensation after applying essential oils, you may not have diluted the oil enough. To help relieve the pain, simply apply more carrier oil to the area. It is important to note that water will not help relieve the pain but may actually increase it, because water will drive the oils deeper into the tissue.

What do I do if I get essential oils in my eyes or other sensitive areas?

First, DO NOT try using water to wash the oils out. Water and oil do not mix, and the water will actually drive the oils deeper. If you get oils in your eyes, wash your eyes with a little carrier oil such as coconut oil. If oils come in contact with other sensitive areas of the body, apply carrier oil to the area to help dilute the essential oils.

What does photosensitive mean?

Using some oils, such as lemon, orange, grapefruit, mandarin, bergamot, angelica, etc., before or during exposure to direct sunlight or UV rays (tanning beds, etc.) may cause a rash, pigmentation, or even severe burns. These oils are designated as photosensitive, and care should be taken after applying these oils on the skin to protect the skin from direct, prolonged ultraviolet light exposure for 1–3 days.

Source: Reference Guide for Essential Oils by Connie and Alan Higley

This information has been designed to help educate the reader in regard to the subject matter covered. This information is provided with the understanding that the publisher, the authors, and Abundant Health™, LLC, are not liable for the misconception or misuse of the information provided. It is not provided in order to diagnose, prescribe, or treat any disease, illness, or injured condition of the body. The authors, publisher, and Abundant Health™, LLC, shall have neither liability nor responsibility to any person or entity with respect to any loss, damage, or injury caused or alleged to be caused, directly or indirectly, by this information. The information presented is in no way intended as a substitute for medical counseling. Anyone suffering from any disease, illness, or injury should consult a qualified health care professional.