Abundant Health™ Blog

January 29, 2015
by Abundant Health™
4 Comments

Black Bean Peppermint Brownies

Upon seeing the title for this recipe, many people may think, “Eew. Black beans in dessert? No, thank you!” But, if you didn’t know the brownies had beans in them, you would probably really enjoy this delicious treat and may even ask for the recipe. Sure, they are healthy and may not taste as sweet as traditional brownies, but adding peppermint essential oil definitely makes them quite appealing! Go ahead—give them a try. You probably won’t regret it.

BlackBeanPeppermintBrownies

Black Bean Peppermint Brownies

Servings: 9–12 | Time: 10 minutes active; 40 minutes inactive | Difficulty: Easy

Ingredients:

  • 1/2 cup quick oats
  • 1 (15 oz.) can black beans, drained and rinsed well
  • 2 Tbsp. cocoa powder
  • 1/3 cup maple syrup
  • 2 Tbsp. sugar (or increase maple syrup to 1/2 cup.)
  • 1/4 cup coconut oil
  • 2 tsp. pure vanilla extract
  • 1/2 tsp. baking powder
  • 1/4 tsp. sea salt
  • 4–5 drops peppermint essential oil
  • 3/4 cup chocolate chips + extra for decoration

Instructions:

  1. Preheat oven to 350 degrees F. Grease a 9×9 or 8×8 pan.
  2. In a blender or food processor, blend the quick oats until they reach a fine consistency. Add the black beans, and blend until smooth.
  3. Add the rest of the ingredients, except the chocolate chips. Blend until smooth.
  4. Stir in the chocolate chips, and pour the batter into the prepared cooking pan.
  5. Sprinkle extra chocolate chips over the top, if desired.
  6. Cook the brownies for about 30 minutes. Brownies are done when a toothpick inserted in the middle comes out clean. Allow to cool at least 10 minutes before cutting.

Source: Adapted from http://chocolatecoveredkatie.com/2012/09/06/no-flour-black-bean-brownies/

January 23, 2015
by Abundant Health™
32 Comments

The Reference Guide for Essential Oils App Is Now Available!

We are thrilled to introduce our new Reference Guide App! This app combines information from the authoritative Reference Guide for Essential Oils, written by Connie and Alan Higley, with convenient search and note-taking features. Use the app anytime, anywhere to quickly find and confidently use recommended essential oils and oil blends for hundreds of different health and wellness conditions. This app is now available in the Google Play Store and in the iTunes Store.

Features of the Reference Guide App

Click on an image to enlarge.

AH_App_Stills-iPhone_mainThis app features 6 different sections—Personal Usage Guide, Application, Single Oils, Oil Blends, Notes, and Store. The first four sections have been condensed from the Reference Guide for Essential Oils to provide you with the most used information needed on the go. The Notes section allows you to view the notes you have made throughout the app. The Store button will lead you to AbundantHealth4u.com so you have quick access to purchase the essential oil–related accessories you need!
AH_App_Stills-iPhone_ConditionsWhen you go into the Personal Guide section, you will see a list of over 700 conditions in alphabetical order. Just scroll through until you find the condition you are looking for! You can also use the alphabet displayed on the right to jump to different sections within this guide. If you know what condition you are looking for, you can quickly find it by using the search bar at the top of the screen. When you click on one of these conditions, you will find a brief explanation of the condition as well as the recommended oils. The oils in green are the most effective for that condition, and the oils in purple are secondary recommendations.
AH_App_Stills-iPhone_NotesIncluded in this app is the ability to take notes. While you are viewing a condition, single oil, or oil blend, you can simply click the “Notes” icon at the bottom of the screen and start typing. To view all of your notes together, just go to the Notes section from the main screen. Once in the Notes section of the app, you can view your notes according to the section you typed them in.
AH_App_Stills-iPhone_ApplicationThe “Application” button will take you to a series of pages providing basic information about the topical, aromatic, and internal applications of essential oils. This section contains some information provided in the Science & Application section of the Reference Guide. You will find concise information about application methods, body systems, auricular therapy, reflex therapy, and emotional release as well as charts and diagrams featuring these topics.
AH_App_Stills-iPhone_CassiaExampleLearn more about single essential oils and essential oil blends and their common uses. This app features over 100 single oils and 90 essential oil blends with information extracted from Reference Guide for Essential Oils–Botanical Family, Extraction Method/Origin, Chemical Constituents, Historical Uses, Common Uses, etc. If you use an essential oil for something not listed in the app or have your own blend, just tap on the “Notes” icon at the bottom of the screen, and write it down. You can access these notes along with your other notes in the notes section of the app.

Frequently Asked Questions

Where do I go to purchase the Reference Guide App?

Download the app today from iTunes or the App Store for Apple devices or from the Google Play Store for Android devices.

Do I need access to the internet to use this app?

You will need internet to download the app and to use the “Store” button, but you do not need an internet connection to view the Personal Guide, Application, Single Oils, Oil Blends, or Notes sections.

Will I need to purchase updates for newer versions?

No. At this time, we are providing the updates for free.

Will this app work on a Kindle, Nook, or Windows phone?

No. Currently, we do not have versions for the Kindle, Nook, or Windows phone.

Does the app contain all the information provided in the Reference Guide for Essential Oils?

No, the app does not contain all the information in the Reference Guide. The Reference Guide has 6 sections: Science and Application, Single Oils, Oil Blends, Personal Care Products, Supplements, New Products, and the Personal Guide. Out of these sections, the app has a condensed part of the application section, the full single oils section, oil blends section, and the personal guide section. The app is designed to accompany the book as a quick on-the-go reference, but we still recommend having the book at home to reference the rest of the information.

Can I get this app in a different language?

Not currently; however, we hope to provide this app in various languages in the future.

January 19, 2015
by Abundant Health™
0 comments

Make-and-Take Class Idea: Therapeutic Hot/Cold Pack Sock

Are you looking for a fun idea for a make-and-take class? Try making therapeutic hot/cold pack socks! Have everyone bring a cute knee-high sock, and enjoy talking about essential oils and their uses while your attendees make these fun hot/cold packs. Offer several different oils for your attendees to choose from––citrus oils for an invigorating cold pack, an immune-strengthening blend for a cold and flu hot/cold pack, peppermint oil for a headache hot pack, etc.

Finished-Sheliese-Sock

These hot/cold packs are so nice to have around when you aren’t feeling well, and they are so easy to make!

1. Pour enough rice into the sock to fill the sock about 3/4 full.

Filling-Sock

2. Add 5–7 drops of essential oil directly on the rice.

Oiling-Sock

3. Tie a knot in the top of the sock to close the hot/cold pack.

Tying-Sock

Therapeutic Hot/Cold Pack Sock

Servings: Makes 1 hot/cold pack |Time: 5 minutes active | Difficulty: Easy

What You Will Need:

  • 4 cups rice
  • 5–7 drops essential oil
  • Knee-high sock

Instructions:

  1. Pour enough rice into the sock to fill it about 3/4 full.
  2. Add 5–7 drops of essential oil directly on the rice.
  3. Tie a knot in the top of the sock to close the hot/cold pack.
  4. Shake the rice pack to distribute the essential oil.
  5. Before using, put the hot/cold pack in the microwave for 1–2 minutes (for a heat pack), or put it in the freezer for a couple hours (for a cold pack).
  6. Wrap the hot/cold pack around your neck, hold it against your temple (for a headache), or use it wherever you are feeling sore or achy.
  7. Refresh the pack with more essential oils as needed––simply untie the knot at the top of the sock, add more oil, and then tie it again! Note: If you don’t want to heat your oils, you can heat the pack in the microwave first, and then add the oils once the pack is hot.

January 8, 2015
by Abundant Health™
0 comments

Simple Steps to Essential Oil Bottle Organization

It is not uncommon for essential oil users to have essential oil bottles scattered all over the house, grouped in clusters on countertops, or piled in drawers or cabinets. Some of these bottles may even be empty or unlabeled; and you probably have a variety of sizes from tiny 1/4 dram sample bottles to larger spray bottles. Does this scenario sound like your home? If so, it may be a worthy goal this year to organize your oils so that you know where to find the oils you need when a small emergency happens.

MLRL2067_Oil_Bottle_Case

We’ve compiled a simple 8-step organization project that can help you gain control of your oil bottle chaos. This project will help you establish an organized “main stash” where you may want to keep some of all your various oils and then smaller stashes where you can store smaller quantities of your most frequently used oils in cases or racks throughout your home.

Step 1: Round up all of your oil bottles.

Walk around your house, and gather all of your essential oil bottles. You may even need to look in the car, your purse, junk drawers, etc.

Step 2: Get an up-cycle bin.

Find a bin that you can store your empty oil bottles in. Many of these bottles can be cleaned and repurposed. Sort through your essential oil bottles, and pull out all of the empty bottles. Place them in this bin for future use.

Step 3: Make sure all the bottles are labeled.

Chances are you have bottles that don’t have labels or bottles that have labels that are worn off or handwritten and smeared by oily hands. You will want to make sure your bottles are labeled correctly so you aren’t guessing when the time comes to use them. Click here to find some blank labels or pre-printed labels.

Step 4: Find a place to keep your main stash.

If you haven’t already done this, determine where you want to keep the majority of your oils. Keep in mind that it is best to store oils out of direct sunlight and in a relatively cool place. One of our employees suggests keeping at least one bottle of all your oils here so if you need something, you always know the best place to look. This can also be the refill station if your other bottles around the house get empty.

Step 5: Get a large rack or case to store your main stash.

With all the oil bottles that will likely be placed here, you will want to find an organized way to store them so you can find the oils you need in a hurry. Abundant Health™ has a variety of large racks or cases for this purpose.

Some case options allow easy viewing of the labels on the sides of bottles. Other options may need labels for the bottle caps for easy identification.

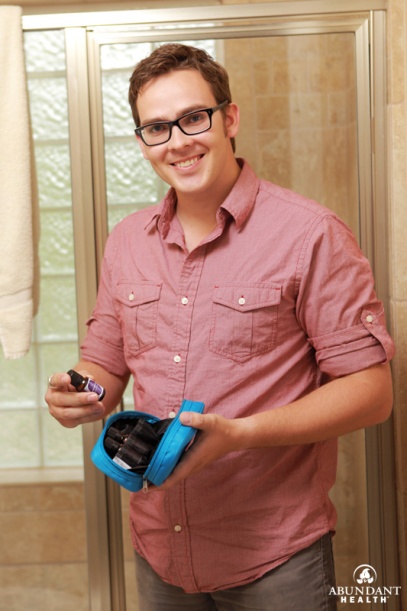
Step 6: Get smaller cases or racks for storing oils in various locations throughout your home.

Small sample bottle cases, such as this keychain case, work well for storing oils in your purse. These small racks are great for displaying your cooking oils. One of our employees also suggests keeping dropper caps on your cooking oil bottles so that you can easily get a single drop out or be able to dip a toothpick in the oil while cooking. Depending on your style, these cases are also great for traveling or for keeping oils in the bathroom, by diffusers, or on nightstands.

Step 7: Prepare essential oil bottles for use in various places.

For example, you may want lemon essential oil to be with your cooking essential oils in the kitchen, and you may also want it by your diffuser in the living room. And if you need to use lemon oil for injuries and such, you will want to have some handy in your main oil stash. If you have lemon oil bottles in your up-cycle bin, just transfer smaller amounts of your oil into these bottles to keep in the other locations. If you don’t have any empty bottles, you can always find some here. Abundant Health™ also carries sample size bottles that are convenient to have when you only need a small amount of oil. Using disposable plastic pipettes is an easy way to transfer oils without making a mess.

Step 8: Place the newly organized essential oil cases & racks in their designated locations, and enjoy the feeling of a job well done!

We are planning a post on ways to up-cycle your essential oil bottles. Would you like to share some of the ways or ideas you have for reusing your essential oil bottles?

← Back

Thank you for your response. ✨

December 30, 2014
by Abundant Health™
0 comments

Rich, Yet Healthy, Hot Chocolate

When the weather is chilly, there is nothing quite like curling up in a blanket and sipping some hot chocolate!

The coconut milk in this recipe provides that delightfully creamy, rich texture and taste and pairs well with thinner milks like almond milk or rice milk. The nice thing about this recipe is that it can be adapted easily to be vegan or sugar-free. Stevia, agave, honey, or maple syrup are good alternatives to the sugar. Just start with a little bit of sweetener, and then add more to your taste preference.

Rich, Yet Healthy, Hot Chocolate

Servings: 2 | Time: 10 minutes | Difficulty: Easy

Ingredients:

  • 2 1/2 Tbsp. unsweetened cocoa powder
  • 1 1/2 Tbsp. sugar or other sweetener
  • Pinch of salt
  • 3/4 cup canned coconut milk (shake before opening)
  • 1 1/2 cups milk (almond or rice milk work too)
  • 1–2 drops peppermint essential oil

Instructions:

  1. In a saucepan, mix together the cocoa powder, salt, and sugar.
  2. Add coconut milk, and heat until combined.
  3. Slowly add milk while continuing to stir. Keep stirring until little bubbles start to form on the surface.
  4. Remove from heat. Allow to cool slightly. Stir in a drop or two of peppermint essential oil.
  5. Pour into mugs, and serve. Warning: It will be hot, so allow the hot chocolate to cool to a reasonable temperature before drinking.

Top with whipped cream, marshmallows, chocolate chips, or ground peppermint candy.

December 19, 2014
by Abundant Health™
0 comments

Whipped Frosting with Essential Oils

EOFrosting1
This kind of frosting is great anytime of the year! It is so easy—you can whip it up by hand in a matter of minutes. It seems fairly thin when you first mix it up, but this makes it much easier to spread onto cookies, cake, cupcakes, or whatever you are decorating. After a few hours, it thickens up to be a wonderful consistency and a full and fluffy appearance!

EOFrosting2

Please make sure that you use food-safe essential oils in this frosting. Not all essential oils are for internal use. Therapeutic-grade essential oils are of the highest quality and many are food-safe. Check the labels to make sure the oils you choose are safe for internal use before using them in this frosting.

For these Christmas sugar cookies, we used 3 drops of peppermint essential oil and green food coloring. The peppermint oil brought a delightfully perfect amount of minty taste to the cookies!

EOFrosting3

Whipped Frosting with Essential Oils

Servings: Yield = approx. 4 cups | Time: 5–8 minutes active | Difficulty: Easy

Ingredients:

  • 1 (8 oz.) container of frozen whipped topping, thawed
  • 1 (3.5 oz.) package of instant vanilla pudding mix
  • 1 cup milk
  • 1 tsp. vanilla extract
  • 1–3 drops of food coloring (if desired)
  • 1–3 drops of the food-safe essential oil of your choice

Instructions:

  1. In a medium bowl, combine pudding mix with milk and vanilla. Mix until smooth.
  2. Gently fold in whipped topping until no streaks remain.
  3. Add 1–3 drops of food coloring, if desired.
  4. Add 1–3 drops of the food-safe essential oil of your choice, and mix thoroughly.
  5. Spread evenly over cookies, cake, or cupcakes.

December 16, 2014
by Abundant Health™
0 comments

Essential Oil Spotlight: Orange

Orange essential oil is derived by cold pressing the rind until the oil is released. According to Roberta Wilson, “From early times, oranges have been associated with generosity and gratitude. Once called ‘golden apples,’ oranges symbolized innocence and fertility.”

Historically, oranges have been used for palpitation, scurvy, jaundice, bleeding, heartburn, relaxed throat, prolapse of the uterus and the anus, diarrhea, and blood in the feces. Some French medicinal uses include angina (false), cardiac spasm, constipation, diarrhea (chronic), dyspepsia (nervous), insomnia, menopause, and palpitation.

Today, orange oil is commonly used for anxiety, calming, constipation, indigestion, obesity, oily skin, uplifting, and water purification. This oil may also help appetite, bones (rickety), bronchitis, colds, colic (dilute for infants; helps them sleep), complexion (dull and oily), dermatitis, digestive system, fever, flu, lower cholesterol, mouth ulcers, muscle soreness, obesity, sedation, tissue repair, water retention, and wrinkles.

Orange oil contains properties that are anticancer, antidepressant, antiseptic, antispasmodic, digestive, sedative, and tonic.

Aromatically, orange brings peace and happiness to the mind and body and joy to the heart, which provide emotional support to help one overcome depression.

Source: Reference Guide to Essential Oils by Alan & Connie Higley

December 4, 2014
by Abundant Health™
2 Comments

Ornament Gift Containers

Give a gift in a unique way this holiday season with these fun gift-box ornaments! These are great for giving small gifts or treats to neighbors or for giving away samples of your favorite holiday essential oils!

Ornament Gift Containers

Difficulty: Easy

Ingredients:

  • Plastic Salve Containers: These are the main part of the ornament and conceal the gift hidden inside. You can use any size container, depending on what you want to put inside. The 1 oz. Salve Jar is pictured above.
  • Narrow 1/4″ Wide Ribbon: This is used to create the loop that you hang the ornament from. You will need a length between 6″ and 10″. You can also substitute yarn or thick string.
  • Wider (3/4″–1″ Wide) Ribbon or Decorative Paper Strips: These are used for decorating the container.
  • Dril and 1/8″ bit: These are used to create a hole in the lid.
  • Glue or Tape: This is used to hold the ribbon and/or paper strips in place.

Instructions:

  1. Unscrew the lid from the salve container. Using the drill and bit, drill a 1/8″ diameter hole in the center of the lid.
  2. Cut a length of narrow ribbon (or string or yarn) to 6–10 inches in length. Pass both ends of the string through the top of the hole in the lid and out the bottom of the hole. Tie a knot with both ends on the bottom side of the lid so the knot blocks the ends of the ribbon from passing back through the hole. If desired, glue or tape the ends of the ribbon to the bottom side of the lid. Screw the lid back onto the container.
  3. Cut a length of ribbon or a decorative paper strip so it wraps around the container. Use glue or tape to attach the ribbon or strip to the bottom part (base) of the container (do not attach it to the lid). Add any other decorations as desired.
  4. Your gift ornament is now ready to fill with your desired gift or treat! Simply unscrew the lid, place the gift or treat inside, and re-fasten the lid to the container. If desired, attach a gift-tag to the ornament.
  5. Some fun ideas for aromatherapy gifts you can place inside this container include the following:

Extra Ideas:

Create 12 or 25 of these ornaments, and attach labels or papers with a number on each ornament to create a fun activity advent calendar for kids. Include small items representing activities to do or strips of paper with titles of Christmas books to read each day.

15 Ways to Use a Shot Glass

December 2, 2014
by Abundant Health™
4 Comments

15 Unique Ways to Use a Shot Glass with Essential Oils

Who would have thought a shot glass could be a great asset to an essential oil user? But, it’s true! Because undiluted essential oils can interact with plastic materials, these small glass cups are perfect for many things that do not involve alcohol consumption. In fact, they make great stocking stuffers, even for children. And, the best part is…these shot glasses from Abundant Health are only a dollar!

AH48 - Essential Oil Shot Glass

15 Unique Ways to Use a Shot Glass with Essential Oils

  1. Try an allergy “shot” with a couple drops each of lavender, lemon, and peppermint diluted in water.
  2. Mix up your own mouthwash by adding 1 drop of peppermint, melaleuca, lemon, orange, cinnamon bark, or an antibacterial blend to water. Gargle, and spit.
  3. When you feel like you are getting sick or getting a sore throat, try taking a “shot” with a drop of oregano diluted in water. Gargle, and swallow.
  4. Fill the shot glass with your daily vitamins and supplements the night before so you will remember them in the morning.
  5. If you have a cough, try adding a drop each of lemon, orange, frankincense, and peppermint to a little bit of honey. Mix with a spoon, and eat.
  6. Try a detox “shot” by adding a drop of lemon to a little water.
  7. Don’t like taking your omega 3 fish oil? Make it a game with another family member, and see who can down their small glass of fish oil the fastest!
  8. AH48_HandMake your own massage blend by putting your carrier oil in the shot glass; then drop essential oils in, and mix. Pour a little bit at a time on area to massage.
  9. Clean your toothbrush at night by setting the brush in a solution of hydrogen peroxide and a drop of lemon oil or an antibacterial blend in the shot glass.
  10. Want to add oils to your bath? Fill your shot glass with Epsom salt, and drop a few drops of your desired oil(s) in. Try a relaxing bath by adding lavender or an energizing bath by adding citrus oils. After you have your Epsom salt and oil mixture, place the shot glass under the bathtub faucet, and let the running water mix it into the filling bathtub.
  11. Make a mini reed diffuser by filling the shot glass 3/4 of the way full with jojoba oil and 5-10 drops of essential oil. Place rattan reeds (cut to 4–5″ tall) in the oil mixture. After a few hours, the reeds will suck up the oil and disperse the scent into the air.
  12. Mix up your own furniture polish by putting a little olive oil in the shot glass and adding a few drops of lemon essential oil. Dip a rag in the mixture, and polish away!
  13. Have you heard of oil pulling? These shot glasses are the perfect size for mixing a little coconut oil and essential oils to swish in your mouth! Just swish for 15–20 minutes, and then spit into the garbage.
  14. Have an upset stomach, heartburn, or motion sickness? Try taking a “shot” of water with a drop of ginger, peppermint, or a digestive blend.
  15. Kids love these glasses because they are miniature and fun! If your child won’t take a capsule with essential oils, just add a drop of oil to water in the shot glass, and make it a game to drink it fast.

Do you have other ideas for how to use a shot glass with essential oils? If so, please comment below!

November 21, 2014
by Abundant Health™
1 Comment

Holiday Spice Popcorn with Essential Oils

Have you tried essential oils in your popcorn yet? Essential oils definitely add amazing flavor to this low-calorie snack. Try out the following flavor ideas, and enjoy some holiday popcorn this season!

Holiday Spice Popcorn

Holiday Spice Popcorn

Servings: 4–5 | Time: 5–10 minutes | Difficulty: Easy

Ingredients:

  • 1/2 cup of unpopped popcorn (12–16 cups popped popcorn)
  • 1/8–1/4 cup unrefined coconut oil
  • 2 Tbsp. maple syrup
  • 2 drops clove essential oil
  • 2 drops orange essential oil
  • 2 drops cinnamon bark essential oil
  • 1 toothpick nutmeg essential oil (dip a toothpick in the oil bottle, and then stir the toothpick into the coconut and maple syrup mixture)
  • Salt to taste
  • Cinnamon powder (optional)

Instructions:

  1. Pop popcorn kernels, and then place popped popcorn in a large bowl or brown paper bag.
  2. Heat coconut oil and maple syrup over low heat until liquified. Remove from heat, and let cool for a couple minutes. Stir in essential oils.
  3. Pour coconut oil mixture over popcorn, and stir or shake to combine.
  4. Add salt and cinnamon powder to taste.

Extra Ideas

  • Throw in other food items such as coconut flakes, nuts, dried fruit, chocolate chips, slivered almonds, etc.
  • Try making white chocolate peppermint popcorn by replacing the coconut oil and maple syrup with white chocolate or almond bark and adding 4–6 drops peppermint essential oil. Include crushed peppermint candy for a holiday look.