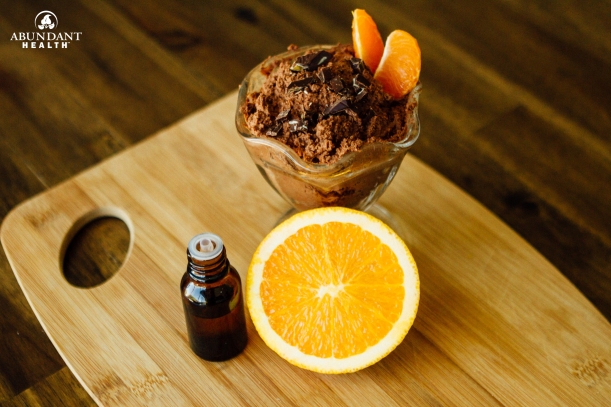
Chocolate and orange are a popular flavor blend during the holidays. This simple recipe captures the deliciousness of chocolate orange candy in a fluffy mouse.
Place as many cotton pads as will fit into your 4 oz. salve jar.
In a separate glass dish, mix witch hazel, coconut oil, vitamin E oil, and essential oils (if not using this for eye makeup). Add hot distilled water; stir to combine as much as possible.
Pour hot liquid over cotton pads gradually, allowing the liquid to soak into the pads as you pour.
To use, wipe a pad across makeup that you want removed. Avoid the eye area if using essential oils in this recipe. Wipe face with a dry tissue to wipe off excess oil if needed.
Do you like exfoliating with a sugar scrub? You may want to give this recipe a try!
While you are in the shower and ready to wash up, just grab one of these and rub it all over your body like you would soap. The soap helps get you clean, the sugar helps exfoliate your skin, the coconut oil replenishes moisture, and the essential oil refreshes the skin and provides a lovely scent. It’s a great way to pamper yourself while showering!
These sugar scrub bars make a great stocking stuffer or addition to any “pamper yourself” gift!
Put the unscented soap and coconut oil in a microwave-safe bowl. Heat in the microwave for 10-second intervals, stirring in between, until melted. You can also melt the ingredients on the stove top with a double boiler if you prefer.
Mix 1/2 cup (100 g) white sugar with 1 drop red food coloring, if desired.
Allow soap/oil mixture to cool for a couple minutes before adding in the white sugar, dyed sugar, and peppermint essential oil.
Press the mixture into a silicone mold, muffin tin lined with paper cups, or a glass dish (to cut into cubes).
Let sit in the fridge or freezer to allow mixture to firm up before cutting into cubes (if needed) and transferring the cubes to your PET jars or other airtight containers.
To use, simply rub a sugar scrub bar over your skin while showering. Rinse off with water.
Extra Scent Ideas:
Autumn Spice: Use brown sugar instead of white sugar and 5 drops cinnamon essential oil instead of the peppermint essential oil. Add 1 Tbsp. (15 ml) maple syrup to the mixture.
Pumpkin Pie: Use brown sugar instead of white sugar. Add 1 Tbsp. (15 ml) honey, 1 tsp. (2 g) pumpkin pie spice, and 2 drops cinnamon essential oil instead of peppermint.
Grapefruit Mint: Use 3 drops grapefruit and 2 drops peppermint essential oil. Add 1 drop red food coloring (optional).
Create your own scent! The possibilities are endless.
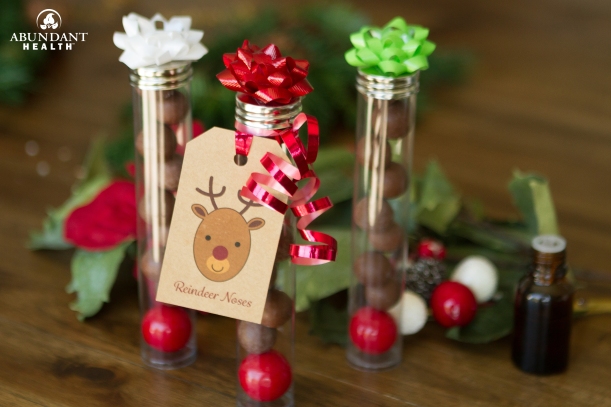
“You know Dasher, and Dancer, and Prancer, and Vixen, Comet, and Cupid, and Donder, and Blitzen. . . .” But did you know that their noses make an adorable decoration or gift for the holidays? Don’t forget Rudolph!
Large red gumballs (make sure they’ll fit in your plastic tubes!)
Curling ribbon
Cute labels
Instructions:
To make these, simply place a red gumball at the bottom of each plastic tube, then add 8 malted milk balls. Close the tubes up, tie some cute ribbon around the top, and give away to friends and family. These also make a fun stocking stuffer for the kids!
Would you like to hold a fun and easy make-and-take essential oil class? Though we call these ornaments, you could use this same idea and make wood slices to decorate any time of the year! You can even use larger wood slices and make drink coasters (if you use them with hot drinks, the oils will diffuse even better!). We also think these make fun gift tags, decorative labels, car diffusers, etc. The ideas are endless!
Here’s what you need for the class:
A short lesson on whatever essential oil–related topic you desire. You can find many good ideas and information in the Reference Guide for Essential Oils.
Wood slices. These can be ordered pre-cut (and even pre-drilled) online, purchased at a craft store, or made from a good tree branch. If you do make your own, you may want to sand them a little too.
A drill. This is for adding a hole that you can use to string up your ornament. If you are doing a different kind of decoration, you may not need a drill.
Decoration supplies. We chose to use a wood-burning tool to decorate our wood slices. You can also do a similar idea with string art using a hammer, small nails, and string/thread. If you are going to hang your wood as ornaments, you will also need ribbon or string.
Essential oils. You may want to have little sample bottles available along with a few holiday-scented blend recipes and allow your guests to choose what oils to add to their sample bottle to take home with their ornament.
When doing this as a class, you may want to set up the make-and-take portion as a line of stations that your guests can go through. Here is how you could set it up:
The first station could be a drilling station where someone is available with a drill to help your guests drill their wood slices. You can also have the wood slices pre-drilled, but doing the drilling at the class could allow your guests to choose whether they want to make an ornament or some other decoration.
The second station could be a drawing station with pencils, scratch paper, and a few simple ideas (to help people get started).
The third station could be a wood-burning station with a couple of wood-burning tools set up and plugged in.
The fourth station could be the ribbon station with a variety of thin ribbons, a ruler, and scissors for your guests to cut a strip about 5–6 inches (13–15 cm) long.
The fifth station could be the essential oil station where you could include a small selection of essential oils with a few holiday-scented blend ideas and small sample bottles for the guests to put their chosen essential oil or blend in. You may also want to include some dispensing tools (such as these 1 ml syringes and Adapta-caps™) to help with the transfer of essential oils to the sample bottles. You can even use these blank labels to make labels for the sample bottles.
Wood Slice Ornaments
Time: 5–15 minutes active | Difficulty: Easy
Ingredients:
Wood slices (cut and sanded, if needed)
Power drill
Pencils
Wood-burning tool
Ribbon
Essential oil(s)
Instructions:
Drill a hole (at least 1/4″ or 1/2 cm from the edge) in each wood slice. If you are doing this with a class, you may want to pre-drill all the wood slices. (If you are making a decoration other than ornaments, you can skip this step.)
Draw an image (such as a snowflake) on the wood slice with a pencil.
Use the wood-burning tool to trace your pencil drawing. Be very careful not to touch the tip of your wood-burning tool, as it is very hot.
Cut a ribbon strip about 5–6 inches (13–15 cm) long, place it through the hole in the wood slice, and tie the ends together.
Add a few drops of essential oil to the wood slice, and hang your ornament on your Christmas tree (or wherever else you want to decorate). Add more oil when needed.
Extra Ideas:
Use these as gift tags, car diffusers, decorative labels, drink coasters, or any other decoration!
You can convert this idea into a child’s craft project by doing string art rather than wood-burning art. To do string art, just hammer small nails into the wood slices, and wrap string (or thread) around the nails to form an image. Easy ideas include stars, Christmas trees, snowflakes, etc.
You can also paint one side of a wood slice with chalkboard paint and decorate it with chalk. Use the other side as a diffuser by adding essential oil to the wood.
Boil potatoes in salted water until tender, about 12 minutes. Preheat the oven to 400°F (205°C).
While the potatoes are cooking, prepare the meat and vegetable base. Heat the olive oil in a large sauté pan over medium-high heat. Add the onion and carrots; cook until they begin to take on color (about 3–4 minutes). Stir in garlic.
Add meat and salt, and cook until meat is browned. Sprinkle the meat with flour, and stir to coat. Continue cooking for another minute.
Add tomato paste, broth, worcestershire sauce, and essential oils to the meat mixture; stir to combine. Continue cooking for a few minutes to help thicken the sauce a little.
Stir in corn kernels and peas with the meat mixture. Transfer mixture to a 9″ × 13″ (23 × 33 cm) casserole dish.
Once potatoes are cooked, drain them and pour them into a bowl. Add butter to the bowl, and cover the butter with the hot potatoes to help it melt. Once the butter melts, add half-and-half, salt, and black pepper essential oil to the potatoes, and mash until smooth. Stir in egg yolk.
Spoon mashed potatoes over the meat and vegetable base, and spread to fully cover the meat mixture.
Bake for 20–25 minutes, or until the potatoes start to brown.
Cassia essential oil is steam-distilled from the bark of the Cinnamomum cassia tree in the Lauraceae family. It has a spicy, warm, sweet aroma.
Historically, cassia has been widely used as a domestic spice. It has also been used medicinally to treat colds, colic, diarrhea, nausea, rheumatism, and digestive complaints.
Cassia oil is best used in small amounts blended with other oils, as it can be very sensitizing to the dermal tissues. Cassia is generally regarded as safe (GRAS) for human consumption but should be well diluted when taken orally.
Cassia oil is considered to have antibacterial, antifungal, and antiviral properties.
Fill your home with the wonderful aromas of the autumn season with this fantastic diffuser blend! Need a diffuser? Check out the diffuser selection from Abundant Health!
“I make a body balm that is great for dry hands/feet year round. I make a large batch to share with others, so this recipe should be scaled down to fit personal needs. Melt 2 oz. coconut oil, 2 oz. shea butter, and 2 oz. beeswax in double boiler. I add in 5 drops vitamin E oil, 20 drops lavender essential oil, and 20 drops patchouli essential oil after the first ingredients are all melted. Then pour it into twist-up tubes (0.5 oz.–2 oz. size) .”
If you are wanting to give this away to friends and family this holiday season, feel free to follow Kristi’s recipe above. Or, if you would rather just make a little bit for yourself and a couple other people, we scaled down the original recipe and included it below.
Melt the coconut oil, shea butter, and beeswax in a double boiler over low heat. Note: you can create a double boiler by placing the oils and beeswax in a heat-proof glass dish, then placing the dish in a pan filled with an inch of water.
Once completely melted, remove from heat and allow to cool for a few minutes. Stir in vitamin E oil and essential oils.
Transfer liquid to deodorant containers, and allow to cool completely.
To use, twist up and rub on skin as needed.
Note: the easiest way to clean up is to wipe as much of the oil/beeswax as possible off all dishes with paper towels before washing with hot, soapy water. Feel free to rub the leftover lotion on your skin before cleaning up!