Abundant Health™ Blog

October 30, 2015
by Abundant Health™
4 Comments

Lime Cheesecake Shooters

Next time you host a party or teach an essential oil class, consider making this dessert for a refreshment. It’s the perfect size for small individual servings and allows each guest to experience the essential oils. Your guests can even take home the shot glass as a little souvenir to remind them of your event! These cute shot glasses are pretty inexpensive and can be used for a lot of different things! You can even print out this pdf of 15 Unique Ways to Use a Shot Glass.

AH_LimeCheesecakeShooters2

Lime Cheesecake Shooters

Servings: 16–20 | Time: 20 minutes active | Difficulty: Easy

Crust:

Ingredients:

  • 3/4 cup vanilla wafers, crushed (approx 20 wafers)
  • 1/4 cup chopped walnuts
  • 1/4 cup melted butter

Instructions:

  1. Mix all ingredients together.
  2. Press mixture into the bottoms of the shot glasses. Distribute evenly—about a tablespoon per glass.

Filling:

Ingredients:

  • 8 oz. cream cheese, softened
  • 1/2 cup powdered sugar
  • 1 tsp. vanilla extract
  • 3 drops lime essential oil
  • 1/4 cup lime juice
  • 1 cup (1/2 pint) heavy whipping cream

Instructions:

  1. Whip together cream cheese, powdered sugar, and vanilla extract.
  2. Once well blended, add lime essential oil and lime juice. (Note: If the lime is added with the other ingredients, the mixture will curdle.)
  3. Whip cream separately until it gets thick (be careful not to over whip!); then fold into cheese mixture.
  4. Pour into individual shot glasses, and chill.

October 26, 2015
by Abundant Health™
0 comments

Fall Diffuser Blend: Autumn Zest

You will fall in love with this blend of citrus and spice essential oils as you diffuse it this autumn season!
Need a diffuser? Get one here!

October 23, 2015
by Abundant Health™
1 Comment

Tools to Make an EO Life Easier: Dropper Tops

Today’s post in the series “Tools to Make an EO Life Easier” is about dropper tops. This handy tool is often called many things like an eye dropper, glass pipette, dropper cap, glass tube with a rubber bulb, etc. We are going to refer to it as a dropper top.

AH_DropperTop_Capsule

Have you ever wondered how to get oil inside a capsule without oil dripping down the side and all over your fingers? Well, this dropper top is the way to go! Bonus hint: If you tend to take the same essential oil formula in capsules, then the simplest way to make up capsules is to create a custom blend in a new bottle with a dropper top. Fill half of the bottle with your customized essential oil blend; then fill the rest of the bottle with a carrier oil that can be ingested like olive oil. The carrier oil helps dilute the essential oils a little for easier digestion.

These handy dropper caps also make filling samples like the 1/4 dram and 5/8 dram sample bottles a breeze! Simply suction some oil up in the glass tube, and then release it into a sample vial for a mess-free filling.

Dropper tops are the EO cook’s best friend! Because essential oils are very potent, a small amount goes a long way, and sometimes that accidental 2nd drop can make a big difference. But, if you have dropper tops on your cooking oils (or get these cute little sample dropper bottles to take up less space), you can get the exact number of drops you need for your recipe. Also, as another bonus, the dropper top is easier to remove than the standard orifice reducer and cap when you need to just dip a toothpick into the oil bottle. Win-win!

We offer bottles with dropper tops in many different sizes as well as the dropper tops alone. This one fits a standard 15 ml bottle if you just want to replace your current bottle cap.

If you have old dropper tops, you can convert them into a neat diffuser like this Candlewick Room Diffuser.

What are ways you use a dropper top?

October 19, 2015
by Abundant Health™
0 comments

Slow Cooker Chili with Cumin Essential Oil

On a cool fall evening, there is nothing quite like a warm bowl of chili with your favorite toppings for a great, feel-good meal! This delicious recipe incorporates the benefits and flavor of pure cumin essential oil.

Chili-3

Slow Cooker Chili with Cumin Essential Oil

Servings: 10 | Time: 25 minutes active; 17 hours inactive | Difficulty: Medium

Ingredients:

  • 1 lb small red beans
  • 14 cups water, divided
  • ½ white onion, diced
  • 1 can crushed tomatoes (28 oz.)
  • 1 lb ground beef, cooked
  • 2 1/2 tsp. salt
  • 2 Tbsp. chili powder
  • 6 drops cumin essential oil

Instructions:

  1. Rinse beans, and then place them in a large bowl. Add 6 cups of water, and leave to soak overnight.
  2. Drain beans, and rinse again.
  3. Place beans in slow cooker with 8 cups of water. Cook on low for 8 hours.
  4. Drain out half of remaining liquid.
  5. Add crushed tomatoes and cooked ground beef.
  6. Stir in salt and chili powder.
  7. Continue cooking on low for an additional hour to allow flavors to blend together.
  8. Turn off slow cooker, and allow chili to cool slightly.
  9. Stir in essential oil.
  10. Serve chili warm. You can eat the chili alone or with your choice of toppings. Some toppings that taste great with this include sliced avocado, diced tomatoes, sour cream, grated cheese, and shredded lettuce.
  11. Enjoy!

October 13, 2015
by Abundant Health™
0 comments

Homemade Mint Chocolate Chips

Who doesn’t love chocolate? We’ve gone to a lot of effort to provide you with a delicious mint chocolate chip recipe that is so easy to make at home and that passed our chocolate chip cookie bake test!

AH_ChocolateChipSpoon

The key to a bakeable chocolate chip is using less cocoa butter than you would for a chocolate bar or dipping chocolate. So, if you aren’t planning on baking these chocolate chips, then adding 4 wafers (.3 oz. or 6 grams) more cocoa butter makes an even better chocolate taste and creates a thinner, pourable texture before cooling.

One recipe we tried included granulated sugar rather than powdered sugar, which added a little crunchy texture that some of our taste testers really enjoyed! So, if you like a crunchy texture, try using granulated sugar instead!

AH_ChocolateChips

We also tried using maple syrup instead of the sugar, but it doesn’t bake very well and has a funny texture when used with the powdered milk. If you don’t wish to bake these chocolate chips and would like a healthier version, omit the powdered milk, and substitute the sugar with maple syrup. Note: this version also melted the fastest, so be sure to store in the refrigerator.

AH_ChocolateChipMold

We used a silicone “hot pad” that had little hexagon holes in it as a chocolate chip mold. We found it at Walmart, but you can also purchase one on Amazon.com. If you would rather, you can spread the chocolate onto a plate or pan and, after frozen, use a knife to break it into chunks. You may even be able to place the chocolate in a plastic bag, snip off a small piece of a corner, and form little drops (although you may need to add another couple cocoa butter wafers or reduce the sugar by a tablespoon to get a little thinner chocolate to do this).

AH_ChocolateChipCookies

Mint Chocolate Chips

Servings: yield=1–1 1/2 cups | Time: 10 minutes active; 1 hour inactive | Difficulty: Easy

Ingredients:

  • 12 cocoa butter wafers (1 oz.) for baking chips or 16 cocoa butter wafers (1.3 oz.) for a thinner chocolate
  • 1/4 cup cocoa or cacao powder
  • 3 Tbsp. powdered sugar (substitute granulated sugar for a crunchy texture or maple syrup for a healthy version)
  • 2 Tbsp. powdered milk (optional; omit when using maple syrup)
  • 1 drop peppermint essential oil

Instructions:

  1. Melt the cocoa butter wafers in a double boiler over medium heat. Once mostly melted, mix in the rest of the ingredients. If following the original recipe, it will look like it doesn’t have enough liquid; but keep mixing, and it will all come together and turn out really soft and dough like.
  2. Spread into chocolate chip mold or onto a pan or plate.
  3. Freeze for about 1 hour or until hardened.
  4. Pop chocolate out of the mold, or use a knife to cut it into chunks.
  5. Enjoy in any of your favorite chocolate desserts!
  6. Store extras in the refrigerator or freezer.

October 7, 2015
by Abundant Health™
0 comments

Tools to Make an EO Life Easier: Funnels

Whenever we explain to a customer why we carry certain items, we tend to get a response similar to these:

  • “That’s a great idea!”
  • “Wow, that would make it easy!”
  • “I never would have thought of that!”

Because of these reactions, we thought we would write a few small posts and give some pointers on how some of our “random” items can be used with essential oils to make your life easier. Of course, these tools could have even more possibilities than the ones we list, so please let us know how you would use them!

So, today, let’s talk about funnels.

Have you ever wasted oil when you try to transfer it from your regular oil bottle to a sample vial? We offer a funnel that has a small opening (about 1/4″) at the bottom—small enough to fit in a 1/4 dram or 5/8 dram sample vial. So next time you are filling sample vials, use a funnel and be worry free.

Do you hate cleaning up the big mess you make when you try to transfer your liquified lip balm creation to the lip balm dispensers? Try a funnel for a mess-free transfer.

Are you tired of cleaning off the sides of your carrier oil (like olive oil, jojoba oil, or fractionated coconut oil) when you are filling a roll-on bottle? A funnel gives you a wider opening to pour into so you don’t have to be as careful when pouring.

A funnel can make many essential oil DIY projects like lotion, candlewick aromatherapy diffuser, hair detangler spray, garden spray, and lavender bubble bath a breeze to make.

What are some ways you would use this mini funnel?

September 30, 2015
by Abundant Health™
5 Comments

Lemon, Lavender, Vanilla Perfume

It’s so easy to make your own perfume when you have essential oils. Plus, you can customize the perfume to whatever scent you prefer!

AH_PerfumeSpray

When creating perfume, it’s important to keep in mind the scents you are combining so that you can maintain good proportions based on the oil’s role in the blend. The Reference Guide for Essential Oils has a section on how to create your own blends as well as a chart that shows what oils are top notes, middle notes, and base notes and proportion guidelines based on the strength of the oil’s scent.

In this perfume, we used lemon as the top note, lavender as the middle note, and vanilla extract as the base note. If you wish to change the scent of your perfume, just see the Reference Guide for a list of oils that could fill the role of the oil you are replacing.

This perfume smells delicious and is a great starting point if you are new to creating your own essential oil perfume!

Lemon, Lavender, Vanilla Perfume

Servings: 2 oz. of perfume | Time: 5 minutes active; 2 weeks inactive | Difficulty: Easy

Ingredients:

Instructions:

  1. Add all ingredients in order to a 2 oz. spray bottle. Shake to combine.
  2. Let sit for 2 weeks to let the ingredients mix thoroughly.
  3. To use, simply spray on neck, wrists, or other area desired.

September 22, 2015
by Abundant Health™
0 comments

Homemade Pure Vanilla Extract

Due to popularity, we’ve brought this post back from the archives!

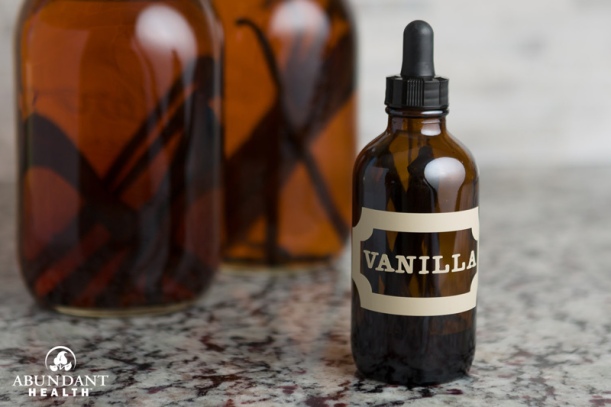
Did you know that there is a difference between imitation vanilla extract found in the grocery store and pure vanilla extract? Imitation vanilla extract is just that: an imitation created by scientists who figured out a way to recreate vanillin (the main flavoring agent in pure vanilla) from wood pulp to mimic the flavor of vanilla. Why go to all that work in creating a fake? The answer is simply because it is cheaper to produce since vanilla beans are a little laborious to grow.

But, vanillin isn’t the only flavor or scent found in pure vanilla—it’s just the strongest. These other weaker components of real vanilla serve to create a softer, more floral scent and flavor. In fact, the flavor varies depending on where the beans were grown.

AH_Vanilla1

Wouldn’t you prefer a better tasting vanilla extract? While pure vanilla extract found in grocery stores can be expensive, making it on your own doesn’t have to be—especially if it is made in large batches (Hint: this would make a great neighbor gift during the holidays).

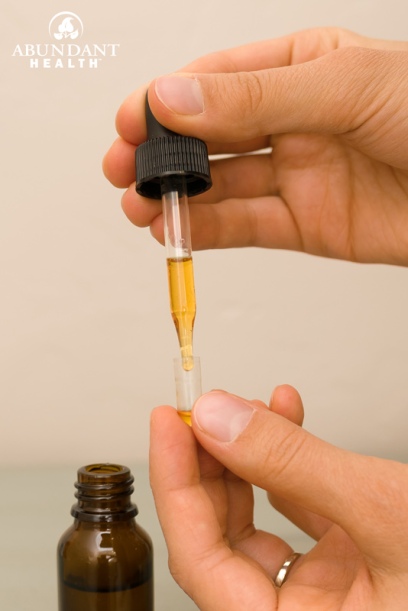
Vanilla extract only requires a few things—vanilla beans, vodka or white rum, glass bottles for storing the extract, and labels. To make this the least expensive way, you will want to consider buying vanilla beans in bulk from an online source like Amazon.com. Also, our 4 oz. glass bottles make great storage containers, and we also offer these cute vinyl vanilla labels that don’t get messed up if you accidentally spill vanilla on them.

When making your own vanilla extract, leave a bean or two in the bottle because, as it sits, the flavor gets richer; and you can always “top it off” with a little more vodka to keep it going.

Because the alcohol needs a little time to extract the flavor from the vanilla beans, it is best to let this sit for 12 weeks before using it. So, if you plan on gifting this for the holidays, you’ll want to get started on this project now.

The recipe given below is to make vanilla extract in bulk. If you only want to make a little bit for your personal use, the rule of thumb to go by is 1 vanilla bean for every 2 oz. of vodka. So if you are making a 4 oz. bottle of vanilla extract, place 2 cut vanilla beans inside the bottle, fill with vodka, and let sit for 12 weeks.

AH_Vanilla2

Homemade Pure Vanilla Extract

Servings: Yield = Thirty-five 4 oz. bottles | Time: 15 minutes active; 3 months inactive | Difficulty: Easy

Ingredients:

  • Two 1.75 liter bottles of vodka or white rum
  • 60 vanilla beans (about 1/2 lb.)
  • 4 oz. glass bottles (approximately 35 bottles)

Instructions:

  1. Cut off the ends of the vanilla beans, and cut each bean lengthwise. Divide them evenly among 4–5 one-quart glass mason jars.
  2. Pour the vodka or rum into the mason jars, covering the vanilla beans, and close tightly. Shake vigorously.
  3. Place in a cool, dark place, and shake the bottles about once a week for a few months (about 12 weeks).
  4. When ready to gift, carefully fill each glass bottle with vanilla extract and secure the lids tightly. Include 1–2 vanilla beans in each bottle (you’ll need to cut each bean in half to fit).
  5. Add a label to the bottle, and include any instructions and the kind of vanilla. If it still needs to sit longer, include a date for when it can be used.

Extra Ideas:

  • If you have beans left over, squeeze out the bean paste, and save it in an airtight container to use in ice creams, sauces, whipped cream, etc. You can also allow the pods to dry out, then grind them into powder using a coffee or spice grinder and mix with sugar or sprinkle on anything you want to add vanilla flavor to.
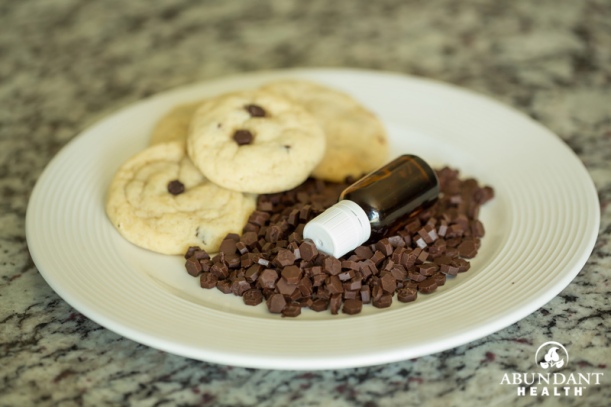
  • To spice up the gift, you can include your favorite recipe that uses vanilla extract and another ingredient in the recipe such as chocolate chips.
  • Use these cute vanilla vinyl labels to really add to the charm of this gift!

Source: http://www.ourbestbites.com/2014/09/christmas-in-october-homemade-vanilla/

September 10, 2015
by Abundant Health™
17 Comments

DIY Essential Oil Breath Mints

Would you like to customize your own breath mints? We want to show you how! This recipe may seem super unhealthy, but keep in mind that you aren’t eating more than 1 or 2 small pieces at a time. In other words, even though these taste amazing, they are breath mints and are meant to be eaten in very small doses.

AH_Mints2_800

Gum paste is likely the ingredient you don’t have on hand; but don’t worry, we have included an easy homemade gum paste recipe with ingredients you probably already have in your house! If you don’t want to make it yourself, you can always buy gum paste at any grocery store or craft store that carries cake decorating supplies.

The hardest part of this recipe is getting the mints all cut out. So, if you don’t have kids that can help, try cutting out squares with a sharp knife instead of using a straw to make the process faster. You can also find tiny metal “clay cutters” at a craft store that would be about the right size and come in a variety of shapes.

Some essential oils we used that taste fantastic as breath mints are peppermint, cinnamon, spearmint, and fennel. Other oils that may taste good are ginger, orange, lemon, or lime. If you want to make them sour, you can even add a little citric acid to the gum paste and dust with citric acid instead of the powdered sugar.

You can store small quantities in your purse or pocket with this 1/4 oz. Salve Jars. These mints also make a great gift!

AH_Mints1_800

Essential Oil Breath Mints

Servings: 200–400 mints | Time: 45–60 minutes active; 48 hours inactive | Difficulty: Easy

Ingredients:

  • Gum Paste (this can be bought at a store that sells cake decorating supplies or made homemade with the recipe below)
  • Food coloring (optional)
  • Essential oils such as peppermint, cinnamon, spearmint, fennel, ginger, orange, lemon, or lime.
  • Powdered sugar (or citric acid for sour flavors)

Instructions:

  1. Pull out a section of gum paste about the size of an egg. Knead it with your hands until it becomes soft and pliable.
  2. Add food coloring if desired (3–4 drops is usually sufficient), and knead until the color is well blended into the dough. (*Helpful hint: to make sure both the food coloring and the essential oil or blend stay in the dough and don’t drip off, create a well in the top of the piece of dough with your finger, drop the coloring or oil in the well, fold the dough so it closes over the well opening, and then continue to knead the dough as normal.)
  3. Add 3–4 drops of your desired essential oil for a mild flavor or 5–8 drops of essential oil for a stronger flavor. We recommend starting with 3 or 4 drops, tasting a small piece, and adding more essential oil if needed.
  4. Once the color and flavor are as desired, sprinkle a little powdered sugar on a clean surface. Use a rolling pin to roll the dough out on the powdered sugar to a little more than 1/8 inch thick.
  5. Cut out your breath mints using a straw (for circles), a sharp knife (for small squares), or another small shape. We used a straw cut down to an inch long.
  6. As you cut out your mints, dust them with a little powdered sugar so they don’t stick together.
  7. Leave the mints exposed to air until they become hard (about 48 hours); then store them in any container.

The 1/4 oz. Salve Jars is a nice sized container to keep some mints handy in your purse or pocket.

Easy Homemade Gum Paste

Servings: Makes 2 egg-sized balls | Time: 10 minutes active | Difficulty: Easy

Ingredients:

  • 4 tsp. water
  • 1 tsp. unflavored gelatin powder
  • 1 tsp. corn syrup
  • 1 1/2 cup powdered sugar + more if needed to get the right consistency

Instructions:

  1. Put 4 tsp. of water in a double boiler or in a glass measuring cup placed in a small pan filled with an inch of water (creating a double boiler).
  2. Sprinkle the gelatin powder over the 4 tsp. of water. Let sit for 5 minutes or until it starts to look foamy.
  3. Stir in the corn syrup, and warm on stove over medium heat, stirring frequently, until the mixture turns clear.
  4. Stir in 1 1/2 cups powdered sugar. Continue adding sugar little by little and kneading with your hands just until it doesn’t stick so much to your fingers.
  5. Once the texture is soft and stretchy, it is ready to use in the recipe above.
  6. If unable to use quickly, store in a plastic bag, making sure to remove all the air. You don’t want the gum paste to dry out before you have a chance to work with it.

August 28, 2015
by Abundant Health™
0 comments

Vegetable Quinoa Bites with Basil Essential Oil

These homemade vegetable bites make a great snack or meal for kids and adults alike. The bite-sized treats are packed with nutrients, so you won’t feel guilty about eating them or giving them to your kids! This recipe makes a lot, but they can easily be frozen and saved for another day.

Vegetable Quinoa Bites with Basil Essential Oil

Servings: About 5–8; makes 60 mini muffins | Time: 45–60 minutes | Difficulty: Easy

Ingredients:

  • 1 1/2 cups cooked quinoa
  • 1/2 head of cauliflower, grated
  • 2 carrots, grated
  • 1 medium zucchini, grated
  • 1 medium red potato, grated
  • 1 cup cheddar cheese, grated
  • 4 eggs
  • 1/2 cup cornmeal
  • 1/4 cup coconut flour (or 3/4 cup all-purpose flour)
  • 1/2 tsp black pepper
  • 3/4 tsp salt
  • 1 tsp ground mustard
  • 1/2 tsp garlic powder
  • 1–2 drops basil essential oil

Instructions:

  1. Cook quinoa (see notes below). Meanwhile grate vegetables and cheese.
  2. Mix together the grated vegetables in a large bowl. Place handfuls of the mixture in a clean kitchen cloth or paper towel, and squeeze out the extra liquid. Mix in cooked quinoa and cheese with the vegetables.
  3. Place all other ingredients (starting with the eggs) in a separate bowl, and whisk until smooth.
  4. Combine the egg mixture into the vegetable mixture. Stir to combine.
  5. Preheat oven to 400 degrees F. Grease a mini muffin tin. (Note: If you don’t have a tin, you can shape them into balls or patties instead.)
  6. Use a tablespoon measuring spoon to scoop the mixture into the muffin tins, and press down until firmly packed in.
  7. Bake for 15–20 minutes or until brown at the edges.
  8. Enjoy these bites alone or with ketchup, avocado, sour cream, or your favorite topping or sauce.

Note: To cook quinoa on the stove, add 3/4 cup quinoa and 3/4 cup water to a small pot. Bring to a boil over medium heat. Once boiling, change the temperature to medium-low heat, and let simmer until most if not all of the water is gone. This will take about 15–20 minutes.
To cook quinoa in the pressure cooker, add 3/4 cup quinoa and 1 1/2 cups water to the pressure cooker. Cook for 7 minutes on high pressure.